FO Spotlight: Third Time’s the Charm

I’ve got another one!

The Rundown

Pattern: Textured shawl recipe by Orlane Sucche

Yarn: 719 yds/240 gm malabrigo Silky Merino in colorway Pradera. It’s about half silk, half merino and it’s a lightly spun single. It’s fairly splitty, but I expected that.

Size made: Until I ran out of yarn! I had about 3 yds left over after binding off. I’d call that a yarn chicken win. It measures about 90″ x 42″ after a fairly aggressive blocking.

Needles: Addi Long Lace Clicks, US10s.

Techniques used: Garter tab, russian joins, k2tog tbl bind off.

Modifications: I fiddled around with the textured stitch a bit before getting it how I wanted it. The pattern doesn’t specify how many sts to cast on. I found that my first garter tab start gave me 2 extra sts, one on each side of the center spine. I thought that diluted the textured panels a bit so reworked it to eliminate those extra sts. The way I did it also helped the textured panels line up the way I wanted (stitches offset by one instead of stacked). Exact notes on what I did are on my project page.

I also changed the number of rows in each section and the total number of sections. The first was because I wasn’t really paying attention and the second was because I wanted to make it larger than called for as well as use up all the yarn. I didn’t do as many rows of garter st at the end as my yarn didn’t make it as far as I’d thought.

Difficulty: Medium, but with a caveat: the actual knitting was very easy. The “pattern” is more of a loose recipe. It has the textured stitch pattern, but leaves the nuts and bolts up to interpretation. This would not be a good first shawl project as you need to have some understanding of how a top down triangular shawl works.

Ravelled: here.

The Pretty

This colorway was tricky to photograph. The actual colors are somewhere in between.

FullSizeRender 455

FullSizeRender 461

When blocking, I worked hard to get the top edge flat and the center spine straight. Since a top-down garter tab triangular shawl comes off the needles in more of a diamond shape, that can take a little doing. I used wires on the top edge and pinned the spine, but didn’t do anything to the cast off edge.

Pre-blocking:

IMG_8500

You can kind of see how the top center has a little extra bulk there. Also, the garter st border flares a bit since the gauge is different.

Blocking:

I didn’t want to pin the bottom edge out because I didn’t want to risk increasing the flaring at all.

I had a helper again:

FullSizeRender 457

FullSizeRender 460

I think the textured stitch works well with the colorway. I don’t love the stockinette portions, but they do help keep it from getting too crazy. It’s soft, has nice drape, and should be easy enough to wear. Bottom line, though: if I made this shawl again, I wouldn’t. There are a ton of awesome shawl patterns out there that are much better written–and that don’t require you to reinvent the wheel.

IMG_8503

IMG_8504

I’m excited for the weather to cool off so I can start wearing shawls again!

FO Spotlight: Paris, Je t’aime!

The rundown

Pattern: Paris Toujours by Isabell Kraemer

Yarn: 922 yds/471 gm madelinetosh Tosk DK in Saffron. It was four full skeins which were slightly over yardage (I think). Madelinetosh yarns are sold by yardage and not weight, so it’s tricky to tell just how much you have.

Size made: Rather large. I added more lace sections but then didn’t have enough yarn to do as robust a garter border at the end. I just kept going until I ran out of yarn. Literally–I had to pull out two and a half rows or I wouldn’t have had enough to bind off. I ended up with less than 1 gm of yarn remaining. After a light blocking, it measures around 120″ long and 50″ deep.

Needles: Addi Long Lace Clicks, US9s.

Techniques used: As written in the pattern, I think. I didn’t take note of the bind off and now I’ve forgotten. I believe it was a k2tog tbl kinda deal. I used russian joins throughout so I only had two ends to weave in at the end. I knit the whole thing in about three weeks and then took six months to weave in two piddly little ends.

Modifications: More lace sections, fewer rows of garter stitch at the end. I used just over the top end of the yardage range listed (750-915).

Difficulty: Easy.

Ravelled: here.

The Pretty

FullSizeRender 447FullSizeRender 453

The color is tricky to capture accurately. It’s a lovely red rust with gold undertones.

I liked making this shawl a lot. The pattern is clear and easy to follow, and the knitting is simple but with enough variation that it’s not mind-numbingly boring. Also, there are some great details, such as the selvage edge:

IMG_7556

It’s super easy to do and looks clean and finished. I’m definitely filing it away for future use.

Not surprisingly, I like the yarn a lot. I haven’t met a madtosh yarn yet that I didn’t like. In this case, I love the depth of the colorway. There’s somehow a lot going on there without having extreme variations. The result is a luscious and deep color that doesn’t fight with the pattern texture. It’s squishy soft and easy to work with. It’s actually a little less soft after blocking, but still easily soft enough for neck wear.

The yarn does, however, grow significantly with blocking in true superwash fashion. As usual I forgot to take pre-blocking measurements, but you can bet it wasn’t ten feet by four feet. I’m going to leave it as is because I like some real estate in a shawl, and I’m planning on keeping this one for myself. If I were giving it to anyone else, I’d probably dampen it and give it some time in the dryer to pull it in a little.

FullSizeRender 446

I’ll get more modeled pics when it’s not 80F out! However, since I said in my last post that I could possibly lose my child in a shawl this size…POIDH*:

FullSizeRender 449FullSizeRender 450

And she wanted me to keep taking pictures of her, so here’s some gratuitous kid pic spam!

I’m very happy with how this shawl turned out. It’s the best kind of project, really–relaxing but not boring, and a great match of pattern and yarn. The result is an accessory that’s easy to wear and looks more complex than it is.

Since my last post, I wove in the (two piddly little) ends on another of the four shawls. I’m thinking I just might be able to block it today. So, who knows? Maybe there’s another FO Spotlight post in my future! In the meantime, I’ve been matching up yarns and patterns on ravelry to try to get a handle on my stash, and putting in some serious work on my Feathery Lace Stole. What are you working on?

Happy knitting!

*Pics or it didn’t happen

So Behind! And an FO Spotlight!

Oh blog, I’ve missed you! It’s been a busy couple of weeks and I’ve been stretched a little thin. I went back to work (after nearly a year on leave) and whew! It’s been challenging, and it hasn’t left me with a lot of free emotional energy for blogging. I am hoping that as I adjust to being back, things will settle and I’ll get into more of a routine, and that there will be space in that routine for regular blogging again.

As you might expect, my knitting time has been affected as well. I have been able to get some things done, though! I ended up with two projects entered into the Ravellenic Games, one WIP and one baby blanket (which I finished with mere minutes to spare). I have yet to get prettified photos of either, so I will wait to share them for a bit.

Earlier this month, Ambah O’Brien posted a testing call for a new cowl pattern.
You might remember I tested her Merinda Shawl pattern a while back:

Well, I love that shawl. It was a lovely pattern and a joy to knit, and I admire many of her other patterns (someday I’ll make a Lilli Pilli). She’s posted a number of testing calls since then, but they’ve mostly been shawls and I just haven’t had the time to squeeze any in. Since this one was a cowl, I just couldn’t resist. I ended up racing a little to get it done, but I did it! It was blocked, dried and photographed by the due date. So, I give you my Mendia Cowl!

The rundown

Pattern: Mendia Cowl by Ambah O’Brien. Not published yet.

Yarn: 308 yards of Noro Silk Garden Lite. I had this in my stash. I have no memory of where it came from!

Size made: One. Finished dimensions are about 29″ in circumference by 13″ tall.

Needles: US6s.

Techniques used: Longtail cast on and a modified stretchy cast off that Ambah developed.

Modifications: None.

Difficulty: I think this pattern is intermediate. The stitch pattern is a little complicated at first blush, but it makes sense once you get into it. The tricky part is making sure you can read your knitting very well as fixing mistakes is challenging.

Ravelled: here.

The Pretty

IMG_6715IMG_6714FullSizeRender 386

I ran into a few knots in the yarn (as seems to happen a lot with Noro). I chose to just carry on with whatever color was there and not worry about keeping the color sequence uninterrupted. I like the slightly more random outcome that gave me. As I was knitting, I kept thinking the colors looked like a southwestern sunset.

Since the yarn I chose is a loosely spun single with some variability in its thickness, the stitch definition isn’t very high. So, the chevron pattern doesn’t pop as much as it could. Other than that, I really like this yarn for the pattern. I like the color gradations, the drape and the texture. Here are some closer pics:

FullSizeRender 385FullSizeRender 384

It ended up with an unexpected rainbow pattern! That’s fine, though–I can rock some rainbows:

IMG_6706

Enjoy this rare sighting of me.

I couldn’t get any better pics because, even in the air conditioning, I couldn’t stand to have it on more than a few seconds! It has been very hot here this month. I am looking forward to fall, and to bringing out my wraps and shawls again!

In all, this ended up being a quick knit, even with lots of twisted stitches and a somewhat fiddly stitch pattern. I think it would look great in a variety of different yarns. In a high-twist merino semisolid, it would have great depth of color and a lot more drape. In this more rustic single, it has a lot of structure which helps it sit well. I’m very happy with it! I have almost two skeins of yarn left, so I might make a hat or mitts to match. I foresee this getting a lot of use this winter!

Happy knitting!

Thursday Sock-Along: WTF, Stripes? Done!

I am pleased as punch (where did that saying come from?) to report that my WTF, Stripes? socks are officially done! They were such a rewarding project because of both the amount I learned and the awesome finished product. I’m going to do this a little differently than my usual FO spotlight format as this project has a rather complicated timeline.

The Beginning

For this pair of socks, I wanted to continue with my overall sock knitting goals: learn new techniques and sock constructions and get closer to finding a sock pattern that fits me well. This pattern was given to me by Carol at just the right time: I was done with my last pair and needed something new, and it incorporated new-to-me techniques. Plus, it just looked really cool! So I picked out my yarn, Regia 4-fädig Mini Ringel Color, and got started. Because the pattern was a gift and I used yarn from my freecycle score, this project cost me only my time.

The pattern, Susan B. Anderson‘s Smooth Operator Socks, is designed to make cuff-down socks with self-striping yarn. The pattern incorporates a modified afterthought heel which allows the stripe sequence to continue uninterrupted through the ankle and instep. The heel modifications allow for a better fit as apparently afterthought heels are often too shallow. I had already decided I wanted my next pair to be toe-up. However, this pattern was easily modified so that didn’t present any problems. I also wanted to do them TAAT. When I do them one at a time, I tend to knit the second sock much tighter. Doing them at the same time would help me keep my gauge more consistent.

I learned from my last pair of socks that I don’t always get 8 sts/” on US1s. For this pair, I went up to US2s and checked my gauge early on. I got around 8.5 sts/”, which was fine. I chose to knit the 72 st size. I used Judy’s Magic Cast On for the toes and got going. Since I was using a pattern specifically designed to show off stripes, I figured I’d try to make my socks match. I started each at (what I thought was) the exact same spot in the color sequence. I actually kind of prefer fraternal twin socks, but I wanted to learn new things!

The Process

Since I was doing toe-up instead of cuff-down, I needed to choose an increase to use for the toes. I initially did left and right raised increases, but I didn’t like the way they looked. I ripped them out and restarted, using m1r and m1l instead. I liked that much better. I wasn’t sure how long to knit the foot before adding waste yarn for the heel. I estimated two inches less than my foot length. After knitting about an inch past the waste yarn, I went back and did the heels…then tried the socks on. And, they were just too big…by about an inch!

FullSizeRender 373

Note the extra length at both the toe and the heel. And the Ms. Potato Head in the background.

I deliberated for a bit, but ultimately ripped out the inch or so of leg, the heels, and an inch and a half of the foot. I re-added my waste yarn and kept going. This time, after I did the heels, the fit was perfect! So, I learned that leaving about 3.5″ for the afterthought heel works well for me.

I made a couple of modifications to the heels the second time around. I started the decreases one round sooner and didn’t decrease as much. I only decreased to 40 sts instead of 28. I decided on this just by trying the sock on every few rows. I guess my heel isn’t as pointy as most! After those modifications, I was much happier with the fit.

FullSizeRender 375

Better, right?

Another thing I did differently on the heels the second time around has to do with how I picked up stitches on the corners of the heel openings. It’s a long story but, suffice it to say, I got much smaller/nonexistent holes. What little gap remained I was able to close up while weaving in the ends.

If you look closely at the two pics above, you’ll notice that they are not identical twins. Even though I started at identical spots in the yarn’s stripe sequence, they didn’t stay identical for long! They each started out with two stripes each of orange, yellow, red and pink. Then, things got a little random. So much for planning! In any case, I just carried on knitting the leg and cuff. I kept going as long as I could in an attempt to use up as much yarn as possible. Interestingly enough, the stripes started matching up again at the top! So they start and end with two stripes each of orange, yellow, red and pink. The only difference at the end was the very last stripe, which made an appearance halfway through each bind off. One was yellow and the other orange. I actually ran out of yarn while binding off one of the socks, so I russian joined some yarn on. I didn’t want to pull a row out and redo it! I like having the extra pop of color on the bind off and, since I used JSSBO, it would have been really irritating to undo.

The End

All told, I used 395 yards of yarn. The legs/cuffs are about 8.5″ long. I like the yarn a lot–the stripes and colors are awesome, and it’s not too coarse for sock yarn. I will give them a wash and a soak and they will probably soften up a bit. I cast on with US1s for a neater toe and switched to US2s on the second or third round. I used Addi Sock Rockets with 40″ cables and knitted them on magic loop.

As for the pattern? I would highly recommend it for first time sock knitters and 100th time sock knitters. There are a number of little tips and tricks included that really make the socks turn out smooth and streamlined, including a modified Kitchener stitch and sleek decreases. Susan posted on her rav group recently that she’s actually come up with some more tricks to make the pattern even better, and she’ll be releasing them sometime next week. The pattern has many clear and detailed pictures and includes links to video tutorials for more information. In particular, there’s a neat trick for picking up gusset corner stitches that I will probably use any time I need to pick up heel or gusset stitches. If you’re at all on the fence, the pattern is still discounted and her KAL is still going on.

Last, but not least:
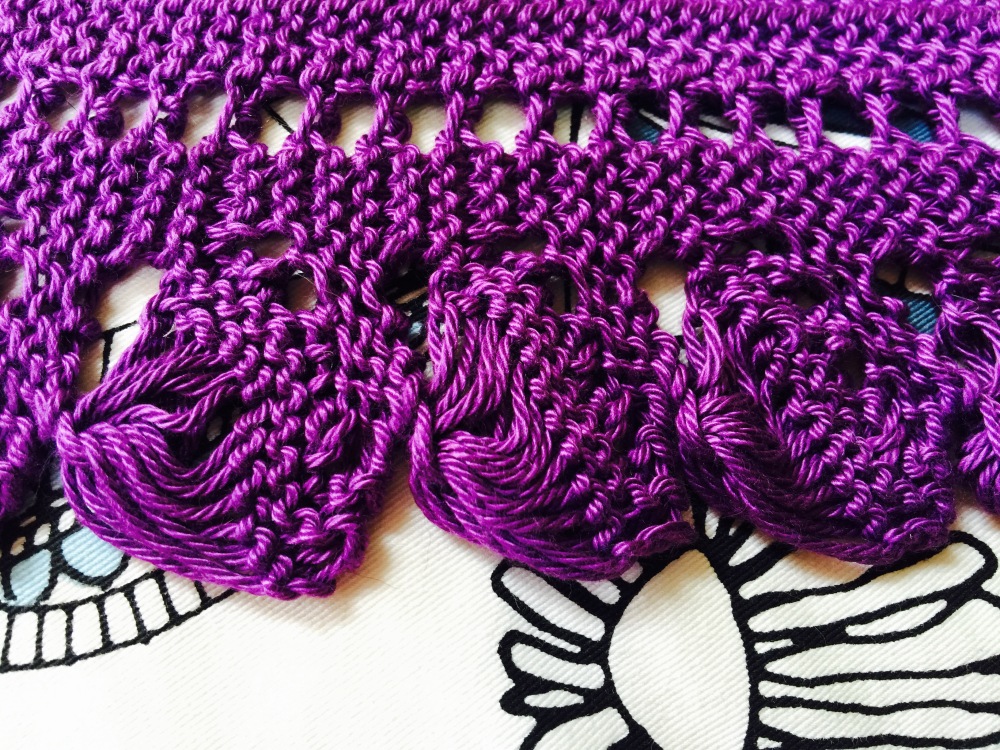
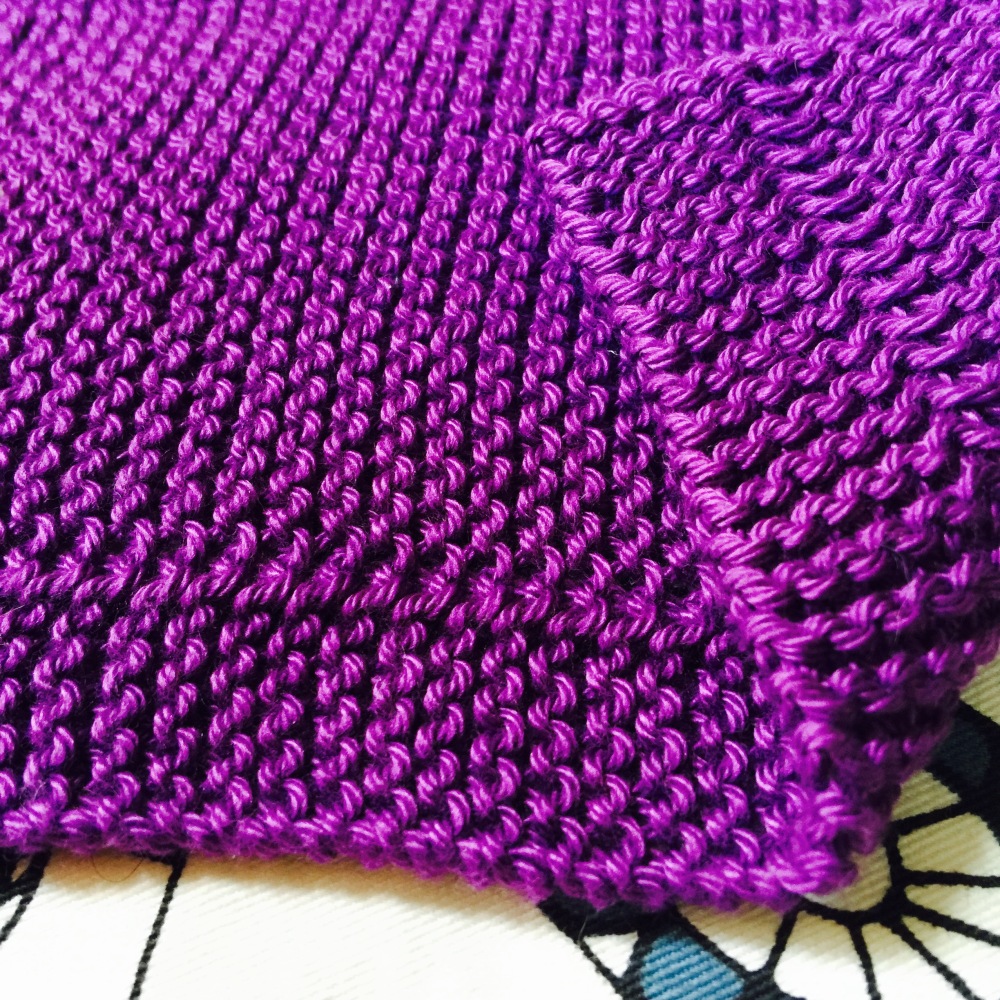
The Pretty

IMG_6614

Sorry (not sorry) for the giant pics. I couldn’t help myself.

IMG_6615

Afterthought heels look funny! They’re really just extra toes.

IMG_6616

Look, Ma! No holes!

IMG_6617

Pretty, pretty toes!

Get ready for even more pic spam!!!

FullSizeRender 380

Image copyright Callandra S. Cook

FullSizeRender 376


FullSizeRender 379

FullSizeRender 378

FullSizeRender 377

Image copyright Callandra S. Cook

Clearly, I love pretty much everything about these socks!

Are you doing any sock knitting? Feel free to post about it on Thursdays and link up with the group! Also, you can share your projects on Instagram with the tag #thursdaysockalong. Check out my fellow Thursday sock knitters here:

FO Spotlight: Cinderella’s Spa Cloth

I jut finished up* my second spa cloth test knit for Carol at knit equals joy! Rumor has it she will be releasing them as an e-book, so stay tuned!

The rundown

Pattern: Cinderella’s Spa Cloth (not yet published) by Carol E. Herman. This pattern will be part of her spa cloth series. The two published patterns in the series are Fairy Godmother’s Spa Cloth and Castle Beach Spa Cloth. I also tested Queen’s Spa Cloth.

Yarn: 65 yards of Cascade Yarns Ultra Pima Fine, same as for the Queen’s Cloth. This one used just shy of a half of a skein, so you could probably squeeze two in for optimum yarn usage! Also, this pattern is very flexible–you could just knit the second one until you had just enough yarn to cast off.

Size made: Per pattern. You can do more or fewer rows to customize the size.

Needles: US4s.

Techniques used: Nothing crazy. I used longtail cast on and standard bind off.

Modifications: None.

Difficulty: Easy. This could be a great first or second project for a new knitter.

Ravelled: here.

The Pretty

First off, I need to share my starting pic. For whatever reason, I just love it!

IMG_6503

I estimated the yarn length for my longtail cast on just right, on the first try! It’s the small joys in life, right? I think the other reason I love this pic is that you can see a hint of my lovely yarn bowl. I don’t use it all that often because I usually work from center pull cakes, but it came in handy for this project.

Okay, enough teasing. Here are the finished pics!

A lot of my comments on the Queen’s Cloth apply to this one, as well. It’s basically the same design, just without the loopy scalloped border. It’s a quick and easy knit that produces a polished, lovely cloth. What more can I say?

I can say at least one more thing: even for a simple project like this, Carol’s pattern is lovely. Everything is clearly and concisely written, and her attention to detail shows. This is the kind of pattern that takes knitting from “home made” to “hand made”.

Happy knitting!

*Full disclosure: It’s not actually technically finished yet. I didn’t weave in the ends! I was in a hurry to get pictures earlier, so I cut corners, so to speak. I’m going to do it at my knitting group tonight 🙂

FO Spotlight: Queen’s Spa Cloth

I did this quick little test knit for Carol of knit equals joy. I’ve got at least one more in the works, so stay tuned for more to come!

The rundown

Pattern: Queen’s Spa Cloth (not yet published) by Carol E. Herman. This pattern is a continuation of her spa cloth series, which so far includes Fairy Godmother’s Spa Cloth and Castle Beach Spa Cloth.

Yarn: 76 yards of Cascade Yarns Ultra Pima Fine. It’s a 100% cotton sport weight yarn. It’s very soft and has a nice, subtle shine.

Size made: Per pattern. You can do more or fewer repeats to customize the size.

Needles: US4s.

Techniques used: Nothing that’s not well described in the pattern. The loopy scalloped stitch on the bottom (well, really the side edge) was new to me, but once I’d given it a try, it was very easy.

Modifications: None.

Difficulty: Somewhere between easy and intermediate. This would not be a good choice for someone’s first project, but would be fine for someone comfortable with yos, slipped stitches and “reading” their knitting.

Ravelled: here.

The Pretty

Here’s a closer look at the bottom edge:

FullSizeRender 368

This was a quick and fun knit. As usual, Carol’s pattern was extremely well written and easy to follow. I enjoyed learning some new things! One thing I particularly love about this pattern is the attention to detail. The “top” edge uses a different slipped stitch technique than I’ve used before, and it makes a very clean and neat edge:

FullSizeRender 369.jpg

Also, the slipped stitch details in the interior look almost like piping. They add a nice, finished touch to the cloth. This project was pretty and fun. I think it would make a lovely gift paired with a bar of fancy soap.

Thanks again to Carol for letting me test another pattern for her! I’m looking forward to casting on for the next one.

Happy knitting!

Thursday Sock-Along: An FO and a Smooth Operator Snag

I finished my In Search of Vanilla socks! Since I’ve covered them here in detail already, I won’t go too crazy with my rundown. The basic idea is that I used the free Petty Harbour sock pattern by Rayna Curtis. I made the 72 stitch version, but as I got over 9.5 sts/”, they didn’t turn out the size large that I had anticipated! They’re closer to a medium and I’m hoping they’ll fit my mom. I used 372 yards of ONline Supersocke 100 Savanne Color that I got from my freecycle score. So, the only cost for this project was the time I put in!

IMG_6425

This was a cuff-down pattern that I knit on US1 dpns (apparently very tightly). There’s a subtle broken rib-type pattern that gives the socks some interest and breaks up the colors a little bit. The heel is a standard heel flap style and the toe is standard, as well. I used Tillybuddy’s very stretchy cast on to start and Kitchener stitch to finish. The only modification I made to the pattern was to pick up one extra stitch per heel flap edge and then add one extra decrease round. I found that made for a much nicer and hole-free gusset.

IMG_6324

The socks aren’t exactly identical, but they’re close. That’s just sheer chance, really–I wasn’t going for matching. These are definitely my best socks so far. I didn’t think I wanted to do another pair of cuff-down heel-flap socks, but I’m glad that I did! I still haven’t found the right pattern and gauge to make a pair that will actually fit me well, but I have some more ideas percolating.

So next up: new socks! Like Paula and Carol and many others, I’m making a pair of Smooth Operators by Susan B. Anderson. If you want to make some too, be sure to hop over to her ravelry group, itty bitty knits. There’s going to be an informal KAL! There’s no thread set up yet, but there isn’t an official start date or anything. So, cast on and join up! I poked through my sock yarn and decided to use these two skeins of Regia, also from my freecycle score:

IMG_6431

Since the pattern is written specifically to accommodate self-striping yarn, I figured I’d try to make them identical. I actually quite like fraternal twin socks, but it’s also nice to learn new things! Since I always seem to need to do things a bit differently, I decided to do these toe-up instead of cuff-down. I cast on a couple of days ago and got going. I chose to use left and right raised increases for the toes. Well, I got almost all the way through the toe increases and then decided to rip them out and start over. I think some combination of my magic loop technique (still in its infancy) and the raised increases led to holes on one edge of each sock.

IMG_6455

good edge

IMG_6458

bad edge

It wasn’t awful, but I could tell it was going to bother me. So, I ripped back and started over. I’m only a few rows in now, but I’m using m1r and m1l instead. So far, so good!

One mini rant: I tend to knit pretty tightly anyway, and with these I’m trying to keep the joins snug. So, doing a m1r one stitch in tends to be pretty tricky. I find it really hard to get the tip of the needle cleanly into the new stitch as it’s really tight, even with my Addi Sock Rockets! Anyone else have this problem? Anyone have a favorite increase to use for toe-up socks?

So far I love how the colorway is working up! I’m definitely sensing a theme: every pair of socks I’ve made so far has had either yellow or orange or both. I guess I like bright socks!

How are your sock explorations coming? Feel free to post about them on Thursdays and link up with the group! Also, you can share your projects on Instagram with the tag #thursdaysockalong. Check out my fellow Thursday sock knitters here:

Happy sock knitting!

FO Spotlight: Zagzig Hat

I’m continuing to get old WIPs finished. Here’s my latest!

The rundown

Pattern: Zagzig Hat by Taiga Hilliard Designs. This pattern is in the same series as the Zagzig skirt I posted about yesterday. This was also a test knit.

Yarn: 108 yards of Alpaca Lana D’Oro by Cascade Yarns. It’s a worsted weight blend of 50% wool and 50% alpaca.

Size made: Teen. Unfortunately, I don’t have a teen-sized model handy, but it looks to be about right!.

Needles: US5s and 7s.

Techniques used: Tillybuddy’s very stretchy cast on. The zigzag pattern is both written out and charted and includes left twists and right twists.

Modifications: None.

Difficulty: Easy. This would be appropriate for an advanced beginner. The left and right twists in the zigzag pattern might be new to a beginner, but they’re not hard once you get the hang of them.

Ravelled: here.

The Pretty

As I don’t have a model for this FO, I don’t have a ton of pictures to show you. Here’s what I’ve got!

IMG_6426IMG_6410

The color is most accurate in the first pic, but it has some weird ripples so I included the second pic as well.

This was a quick and easy knit. The zigzag pattern added just enough interest to keep it from getting too boring. The pattern is sized from newborn to large adult, so there are lots of options.

I like the yarn I made this in. It seems more like alpaca than wool, even though it’s an even blend of both. It’s very soft and the color has a pretty heathered look to it. I got two skeins of it from the freecycle haul, so I have plenty left over to make something else!

Happy knitting!

FO Spotlight: Zagzig Skirt

This project was another test knit for cashmerejunkie, aka Taiga Hilliard Designs. The knitting has been done for a while, and I even wove in the ends as I went! However, it needed elastic in the waistband to be really finished. I finally got that done the other day!

The rundown

Pattern: Zagzig Skirt by Taiga Hilliard Designs.

Yarn: A total of 205 yards of four different colors of Vanna’s Choice Solids. It’s an aran weight, 100% acrylic yarn. I think I got it all at the thrift store at one time or another! The pattern can be made in stripes, colorblock or solid.

Size made: 4T. The model is 3.5 yo.

Needles: US7s.

Techniques used: I used TECHknitter’s traveling jogless stripe technique for the stripes, but it wasn’t perfect. The zigzag pattern is both written out and charted and includes left twists and right twists.

Modifications: None except doing the colorblock/stripes.

Difficulty: Easy. This would be appropriate for an advanced beginner. The left and right twists in the zigzag pattern might be new to a beginner, but they’re not hard once you get the hang of them.

Ravelled: here.

The Pretty

FullSizeRender 352

This pic is after elastic but before washing. I didn’t bother blocking it exactly; since it’s acrylic it wouldn’t do much anyway. I did hang it to dry so that maybe the weight of it would pull the flared edge down a bit. It actually worked! It’s like that because I often am so focused on not binding off too tightly that I end up binding off way too loosely. If I made this again, I would try to avoid that.

She really didn’t want to pose or hold still for pictures, as usual. She mostly just wanted to twirl! But at least you get the basic idea of how the skirt looks and fits. It’s a little on the large side, but I think it will fit her just right in the fall/winter this year. Since it’s aran weight acrylic it’s on the warm side anyway, so that will probably be just right.

This was a quick and easy knit. My favorite part of this design is the waistband. The clever construction means you don’t have to do any sewing, and it’s very easy to execute. Also, it lies nicely and is very neat. The pattern is sized from newborn up to 10 years, so is very versatile. I don’t love the yarn I chose, but I had it on hand and it was right for the job. I like the colors and I like that it’s machine washable. Also, skirts can get some heavy wear and tear. With this one, I won’t be upset if (when) she decides to sit down on the sidewalk or brick, or otherwise put it through the normal small child wringer.

Some tips if you are thinking of making this: always slip stitches with the yarn in back. Also, if you’re doing any stripes, I would recommend not changing colors right before the zigzag pattern–do it at least three rows before as the twists pull on the fabric a bit and will otherwise give the color change row an uneven look. Overall, this was a fun knit and I could see myself making it again.

Happy knitting!

FO Spotlight: Baby Broadsword, Helmet & Diaper Cover

Since I made these three items as a set, I figured it would make sense to post about them all at once. I put the finishing touches on the sword last night at my fiber arts group. so it’s all finally ready to be revealed! This set was commissioned by a contact on FaceBook. It’s intended to be used for a child’s first birthday party, for props and photos. I had a hard time finding just the right patterns for everything, so I ended up modifying one and just making another up on my own.

The first piece is the Knight’s Helmet Hat. I used the Sir Knight Helmet pattern by Martina Gardiner ($5). The client wanted the blade part to come up and over the crown more than in the pattern, so I modified it. Otherwise, I made it as written for the toddler size.

IMG_6136

The visor has sort of an odd construction, but I think it will work out all right. It does tend to pull in pretty strongly due to the color changes. If I made it again, I would work that part much more loosely. I found the coolest buttons to use for it, though:

IMG_6120

I tried to get some modeled shots on this one year old cutie, but she wasn’t having much of it! Here’s the best I was able to get:

FullSizeRender 328

The visor is designed to be worn either up, as shown, or across the mouth like a real helmet. Since your average toddler isn’t likely to tolerate the latter for very long, I’m glad it’s versatile! The fit in the picture isn’t great as her head is a bit smaller than the recipient’s is. Hopefully it will fit him just right!

The second piece I made was a matching diaper cover. I used the Cheeky Soaker pattern by Megan Christensen. I made size medium based on the recipient’s waist measurement but made a couple of modifications. Since this won’t be used as a soaker, it’ll probably be worn over less bulky disposable diapers. So, I made the waistband a bit shorter and erred on the shorter side when making the rise. The pattern provides a number of different options for waistband styles. I chose to do k2p2 rib and use an I cord drawstring. I added some short rows in the butt (more details are on my project page, linked above).

IMG_6104

I made the I cord just long enough to tie and to knot each end.

One thing I really like about this (free) pattern is the ribbing on the sides and the crotch. It looks pretty cool that way and I think it will help it fit well. Here’s a shot of the side so you can see what I mean:

IMG_6105

This view also shows the effect of the short rows on the butt.

I used my standard stretchy cast on (Tillybuddy’s) and bind off (JSSBO) for these.

And now, the pièce de résistance: the sword. When I searched ravelry, I did actually find a few sword patterns, ranging from free to about $6. However, none of them really had the look I had in mind. After looking through hundreds of project photos, I began to get an idea for what I wanted. I knew I wanted the center of the blade to have definition and that the edges should be distinct. I started playing around with some different options and finally decided I would come up with my own pattern.

Let me just pause here to say that I’ve never designed something from scratch. I’ve modified existing patterns, sometimes heavily, but I’ve always had a starting point and an overall concept to guide me. This was something completely different. I had a lot of respect for designers before, but now it’s been firmly cemented in place!

So, I got an idea for how to start. I cast on, worked some, thought of a better way, ripped it out and started over…several times. I kinda lost count. I gradually refined my approach until I couldn’t think of any more improvements. At each transition, I repeated the same process: work some, realize I’d made a mistake/could do something better, rip it out, start that section again. I wish I had outtake videos of this process. If I did, I could show you the scene where I finally figured out how to finish the blade. I got it all done, then realized that my awesome technique had served to sew the opening together! Since that clearly wouldn’t work (I used cardboard and popsicle, I mean craft, sticks to give it shape), I had to rip it back and come up with another way. Eventually, I figured the whole thing out, got it knitted up, stuffed with cardboard cutouts and a bit of polyfill, and sewn together. The last touch was a bit of embroidery around the join between the blade and the hilt as there was some gapping there. Here’s the finished product:

FullSizeRender 343FullSizeRender 342FullSizeRender 341

I decided to name it “Baby Broadsword” since the blade is on the wider side. Here’s a closer view of the embroidery:

FullSizeRender 340

And some fuzz

And a shot of the whole set:

FullSizeRender 344

For all three pieces, I used a basic aran weight acrylic. It wasn’t my favorite yarn to work with, but I just couldn’t see using wool for a July birthday set. I used two colors of Big Twist Yarns Value Solids (medium grey and black) and it worked pretty well. I used US5, 6 and 7s. If I made another set like this, I would choose a yarn with a tighter twist. Despite the name, I found this yarn to be too splitty for the job.

I am just about as thrilled as I could be with how the whole set turned out. I can’t wait to see pictures of it on the birthday boy! If I ever get my Etsy shop opened, I plan on including things like these. I’m also planning on writing up the sword pattern and offering it for sale on ravelry. That wasn’t my thought going in, but I’m really pleased with how it turned out. I’m proud of the method I came up with, and I think it’s worth publishing. We’ll see if I can live up to my own high pattern standards!

Happy knitting!